Tuesday, March 22, 2011

Salted chocolate peanut butter surprise cookies


Sometimes people tell me I look like Lindsay Lohan. Then they bite their tongue and say "I mean, before her cracked-out coke days." Oh, so you mean... Parent Trap Lindsay? "Y-Yes!" they say, as if I read their mind. OK, so maybe they're a little right. Me and Parent Trap Lindsay both have freckles, the same complexion, and the same nose. And the same eyes. Yeah. 

Moving on. So now I'm an official Parent Trap Lindsay doppleganger. Which pretty much means everything Parent Trap Lindsay did in the movie is something that I wanted to do as a kid. Because we're the same person. Obviously. Like eating Oreos and peanut butter. It's like the best thing ever. And we both do it, which makes both of us pretty cool. So ever since the movie came out in 1998, I've eaten Oreos and peanut butter like it's my job. Which kind of turned me onto chocolate and peanut butter in general.

For the dough:

1 1/2 cups all-purpose flour
1/2 cup unsweetened cocoa powder
1/2 teaspoon baking soda
1/4 teaspoon salt
1/2 cup butter, softened
1/2 cup granulated sugar
1/2 cup packed brown sugar
1/4 cup peanut butter
1 egg
1 tablespoon milk
1 teaspoon vanilla
2 teaspoons sea salt

For the filling: 

3/4 cup sifted powdered sugar
3/4 cup smooth peanut butter
1/2 teaspoon regular iodized salt

Preheat oven to 350°F. In a medium mixing bowl stir together flour, cocoa powder, salt and baking soda; set aside.

In a large mixing bowl beat together butter, the 1/2 cup granulated sugar, brown sugar, and the 1/4 cup peanut butter with an electric mixer until combined. Add egg, milk, and vanilla; beat well. Beat in as much of the dry ingredients as you can with mixer. Stir in remaining dry ingredients by hand with a wooden spoon. Form chocolate dough into 32 balls about 1-1/4 inches in diameter. Set aside.

For peanut butter filling, in a medium mixing bowl combine powdered sugar and the remaining 3/4 cup peanut butter until smooth. Shape mixture into 32 (3/4-inch) balls.

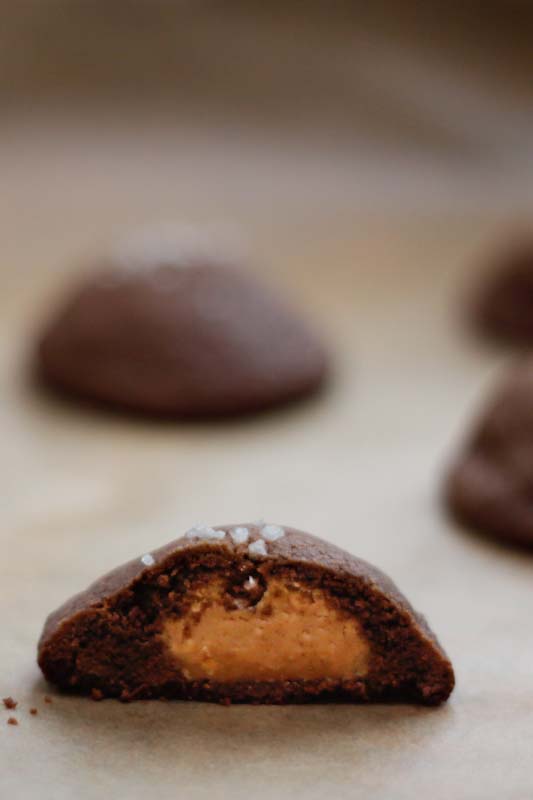
On a work surface, slightly flatten a chocolate dough ball and top with a peanut butter ball. Shape the chocolate dough over the peanut butter filling, completely covering the filling. Roll dough into a ball. Repeat with the remaining chocolate dough and peanut butter filling balls.

Place balls 2 inches apart on an ungreased cookie sheet. Lightly flatten with the bottom of a glass dipped in the 2 tablespoons granulated sugar. Bake cookies in preheated oven for 12 minutes or until they're just set and surface is slightly cracked. Let cookies stand for 1 minute. Transfer cookies to wire racks; cool completely. Save for later? No. Devour now? Yes.

Recipe adapted from The Dragon's Kitchen.

Tuesday, March 15, 2011

Crème brûlée


Mum had jaw surgery yesterday, so I made this for her. Obviously it was gone in a second. Note to self: crème brûlée makes drugged-up post-op patients really happy.

Makes 4 ramekins

For the crème brûlée:

3 egg yolks
1 1/2 tbsp sugar
1/2 to 2/3 vanilla pod
1 1/3 cups heavy whipping cream

Mum likes it!

Preheat the oven to 320°F. Place four small-medium ramekins into a small roasting tray. Put the kettle on to boil. Chop the pod into 1/2 inch chunks with a knife or scissors. Put in the bowl of a food processor along with the rest of the ingredients. Blend until the pod seems finely chopped and the seeds are distributed throughout the mixture. Pour through a sieve into a jug. Pour into 4 small ramekins, working to evenly distribute between them. Place the tray into the oven and pour hot water from the kettle into the roasting tray carefully up to 1/2 way up the sides, avoiding it splashing into the ramekins. 

Bake until they still wobble when shaken but are set and have a golden crust - about 50 minutes. Remove from the water to a rack and cool. When room temperature, place into the fridge for at least four hours.

When ready to brûlée, take them out onto the side for 5 minutes to take the proper chill off them before you start. Sprinkle about a tbsp of granulated sugar over the crust, spreading it evenly and making sure it reaches the sides. Fire up your blowtorch and start melting the sugar. Keep going until it's deep golden brown and bubbling. Leave to cool for a few minutes so the pool of caramel sets then serve.

Friday, March 11, 2011

A buh buh buh... low-fat cheesecake like woah


I really like cheesecake a lot a lot a lot.


For the cheesecake:

1 1/2 pounds (24 ounces) Neufatel cheese, room temperature
1 cup granulated sugar
4 eggs
1/3 cup whole milk
1 1/2 teaspoons vanilla extract

For the crust:

1 1/4 cups graham cracker crumbs
1/4 cup granulated sugar
5 tablespoons butter, melted

For the sauce:

2 pints fresh strawberries
1/4 cup granulated sugar
zest of 1/2 lemon

Preheat oven to 200°F. Mix together graham cracker crumbs, sugar, and melted butter. Using a fork, press the crumb mixture firmly into the bottom of a 9 1/2 inch springform pan. Pat evenly to coat the bottom and sides of the pan.  Set aside.

In a large bowl, beat Neufatel cheese on medium speed with an electric mixer until fluffy, about two minutes. Blend in sugar and then eggs, one at a time, beating after each addition. Add milk and vanilla extract, and beat another two minutes. Pour mixture into prepared crust. Set pan on baking sheet. Bake at 200°F for two hours, then turn heat up to 300°F and continue to bake for another 30 minutes. Cool completely on a wire rack, chill thoroughly before serving.

While cheesecake is cooling: Prepare strawberries by cutting off stems and slicing each berry in half or quarters. In a medium pan bring the cut strawberries, lemon zest, and sugar to a boil. Once boiling, turn heat down to simmer and heat for 15 minutes. Add cornstarch if necessary to thicken the sauce. Allow to cool completely, then serve on top of cheesecake. Wahoo!

Monday, March 7, 2011

Call me a regular bread maker...


Various unsuccessful attempts at bread-baking over the course of my childhood caused me to become very of any recipe calling for yeast. Nervous that it will turn out horribly, I shy away from yeasty baked goods, although they tend to be the best kind (who doesn't want bread and sugar melded together in perfect harmony?). However, one day I came across this recipe for english muffins and decided to tuck them away in my recipe book, somewhat anxiously anticipating the day that I would chose to take on a yeast-related recipe. Today was that day. I woke up and decided to take on the morning with these english muffkies (as my dad calls them). And you know what? Not only were they super easy, but they tasted like real english muffins! Just as good as Pepperidge Farms or Thomas'. They were airy and delish,  cut in half easily, and they even looked like the real thing! With my new found confidence I think I might just take on the world. Or at least another yeasty recipe...


Makes 6 english muffkies

For the muffkies;

2 1/4 cup bread flour
1 1/2 teaspoons  sugar
3/4 teaspoon salt
1 1/4 teaspoon active dry yeast
1 tablespoon shortening (such as Crisco)
3/4 cup buttermilk (plus 1/4 cup)
Cornmeal

In a large bowl, mix together flour, sugar, salt and yeast. Add shortening and 3/4 cup buttermilk and mix with a hand mixer or in your stand mixer. Add extra 1/4-cup buttermilk, a little at a time, until dough comes together.

Knead dough by hand for 10 minutes or in the stand mixer for 8 minutes. If using a stand mixer, knead the last minute by hand. The dough should be tacky, but not sticky. Oil a medium bowl and place dough inside. Turn dough in bowl to coat in oil. Cover with plastic wrap or a kitchen towel and let dough sit until doubled in size (about 60 to 90 minutes).

Prepare a sheet pan with parchment paper and sprinkle with cornmeal. Divide dough into 6 equal pieces. Shape pieces into balls, spray with oil, and sprinkle cornmeal on both sides before placing on prepared baking sheet. Cover with plastic wrap and let the muffins rise for about an hour.

Heat a griddle to medium heat and preheat oven to 350°F. Add muffins to the griddle and cook for 5 minutes on each side. Place muffins in the oven and bake for an additional 6 minutes. Allow muffins to cool completely on a wire rack. Enjoy with butter and jam!

Tuesday, March 1, 2011

Chocolate espresso puddles


I like sunny days like these. They make me hopeful that Boston winter is about to end. Although they also make me cry because I go out for a nice run in shorts and a T-shirt only to find that the snow that has so happily melted away is now all over my nice new running shoes. I run through puddle after puddle of melty snow shit, wishing the weather would just make up its mind already and either be freezing cold with ice puddles or warm with no puddles at all. Then I go home and make puddle cookies and everything is all better.

Makes 24 puddles

For the puddles:

6 ounces semi-sweet chocolate, chopped into 1/2-inch pieces
1/3 cup dark chocolate-covered espresso beans
1 cup flour
2 tablespoons unsweetened cocoa powder
1 teaspoon baking powder
1/4 teaspoon salt
3/4 cup sugar
2 tablespoons unsalted butter, room temperature
2 eggs, at room temperature
2 tablespoons water
1 teaspoon vanilla extract
1 cup semi-sweet chocolate chips

these are good puddles. if my shoes
got dirty in these, that would be dandy.

Place an oven rack in the center of the oven. Preheat the oven to 300°F. Line 2 baking sheets with parchment paper. Set aside.

In a small bowl, combine the chocolate and butter. Place the bowl over a pan of barely simmering water and stir occasionally until the chocolate has melted and the mixture is smooth.

In the bowl of a food processor, finely chop the chocolate covered espresso beans. In a medium bowl, whisk together the chopped espresso beans, flour, cocoa powder, baking powder, and salt.

In another medium bowl, whisk together the sugar, eggs, water, and vanilla extract. Gradually add the dry ingredients and stir until thick and smooth. Fold in the melted chocolate. Stir in the chocolate chips. Using a cookie or ice cream scoop, scoop level 1/4 cupfuls of the batter onto the prepared baking sheets. Bake until slightly puffed and the tops begin to crack, 18 to 20 minutes. Allow the cookies to cool completely on the baking sheets and serve.

Recipe from Giada at Home.